Cold therapy is mainstream for athletes and biohackers, but should you build a DIY cold plunge or buy a commercial unit in 2025? This article compares upfront costs, running expenses, performance benefits, safety and maintenance for athletes and teams—plus practical protocols for temperatures, timing, contrast therapy and recovery routines tailored to different sports.
Why Cold Plunge Decisions Matter for Performance and Budget
Deciding between building your own cold plunge and buying a commercial one is more than a simple budget calculation. It’s a strategic choice that directly impacts your recovery protocols, consistency, and ultimately, your performance gains. For athletes, coaches, and anyone serious about physical optimization, this decision defines the accessibility and precision of one of your most powerful recovery tools. The right choice makes cold exposure a seamless part of your routine, while the wrong one can turn it into a costly, time-consuming chore that you eventually abandon.
The evidence supporting cold water immersion has become increasingly robust. Systematic reviews published between 2022 and 2025 confirm that consistent cold exposure significantly influences recovery. Physiologically, it works by constricting blood vessels, which helps reduce inflammatory responses post-exercise. A 2023 meta-analysis quantified this by showing a 20-30% drop in C-reactive protein (CRP), a key inflammation marker, in athletes who used cold immersion after strenuous sessions. This isn’t just a feeling; it’s a measurable biological effect. For athletes in strength sports, this translates to a tangible reduction in Delayed Onset Muscle Soreness (DOMS). Recent randomized controlled trials from 2024 found that athletes reported up to a 30% decrease in muscle soreness, allowing for higher quality training sessions sooner.
These benefits extend beyond just muscle recovery. A 2024 study linked post-plunge increases in Heart Rate Variability (HRV) to a 10-20% improvement in self-reported sleep quality. Better sleep is the foundation of all recovery. Performance metrics also see a direct impact. Reviews from 2023 noted a 2-5% increase in peak power output for sprint athletes, while endurance athletes experienced a 15% reduction in perceived fatigue during subsequent workouts. The old concern that cold exposure might blunt hypertrophy has also been addressed, with a major 2023 meta-analysis finding no significant impairment to strength or muscle mass gains when protocols are timed correctly.
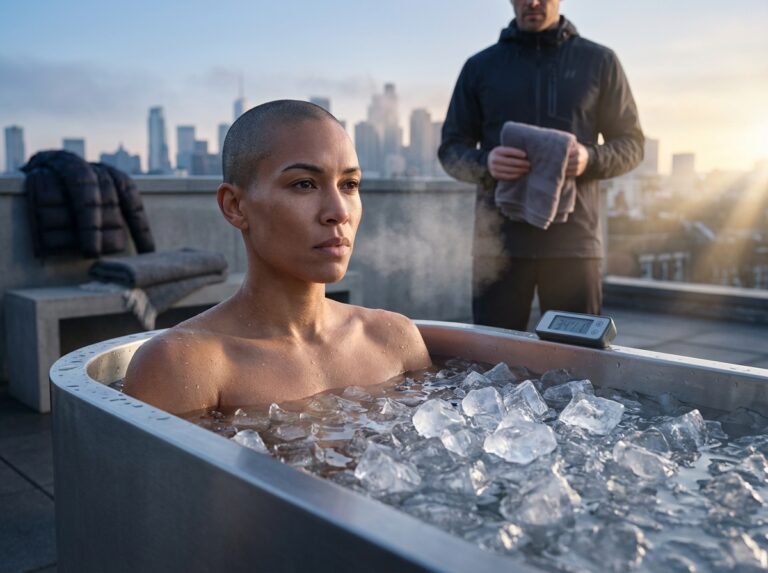
However, achieving these results depends entirely on consistency and precision, which is where the DIY versus buy dilemma comes into play. The optimal therapeutic window identified in sports medicine guidelines is often narrow, typically 5-15 minutes at temperatures between 10-15°C (50-59°F). A commercial unit with a chiller and thermostat can hold a precise 12°C indefinitely. It’s always ready. This is critical if you’re following a specific protocol to maximize recovery. Trying to achieve this with bags of ice is an exercise in frustration. You’re constantly measuring, adding more ice, and dealing with a fluctuating temperature, making the protocol difficult to replicate.
This is where you must weigh cost against outcomes. If your goal is simply a refreshing dip a few times a month, a basic DIY setup might be sufficient. But if you’re an athlete plunging 4-5 times a week, the cost and hassle of ice become prohibitive. At an average of $17 per session for ice, you could spend over $4,000 a year, more than the upfront cost of many entry-level commercial units that cost around $20 a month to run. For a household with multiple users or a small training facility, the equation shifts even further. A commercial unit offers superior sanitation with ozone or UV filtration, a critical factor for health and safety that is complex and costly to replicate effectively in a DIY build. The convenience of a ready-to-use system encourages adherence, ensuring you and your athletes actually get the benefits you’re investing in. A DIY project might save money upfront, but if it’s too much work to use, its effective cost is infinite because its benefit is zero.
Before exploring the specific types of builds and units, clarify your own priorities. Your answers will guide you to the right solution for your performance goals and budget.
- Cost: What is your maximum upfront budget? Are you more concerned with the initial purchase price or the long-term operational cost?
- Convenience: How much time are you willing to dedicate to setup, cooling, and cleanup for each session? Is “always on and ready” a priority?
- Temperature Precision: Do you need to maintain a specific temperature to follow evidence-based protocols, or is a generally “cold” temperature acceptable?
- Sanitation: Will you be the only user, or will family, friends, or teammates be using the plunge? How critical is advanced water filtration and sanitation?
- Durability & Support: Do you value a manufacturer’s warranty and customer support, or are you comfortable troubleshooting and repairing a system you built yourself?
- Aesthetics & Space: Where will the plunge be located? Does it need to fit into a specific aesthetic, or is pure functionality your only concern?
Understanding DIY Builds and Commercial Units in Plain Terms
Deciding between building your own cold plunge and buying one off the shelf can feel overwhelming. Let’s break down the most common options you’ll find in 2025, looking at what they’re made of, what they cost, and where they shine or fall short.
The Do-It-Yourself (DIY) Route
Going DIY means you are the architect, plumber, and electrician. It offers maximum customization and potential savings, but it requires time, effort, and a bit of technical skill.
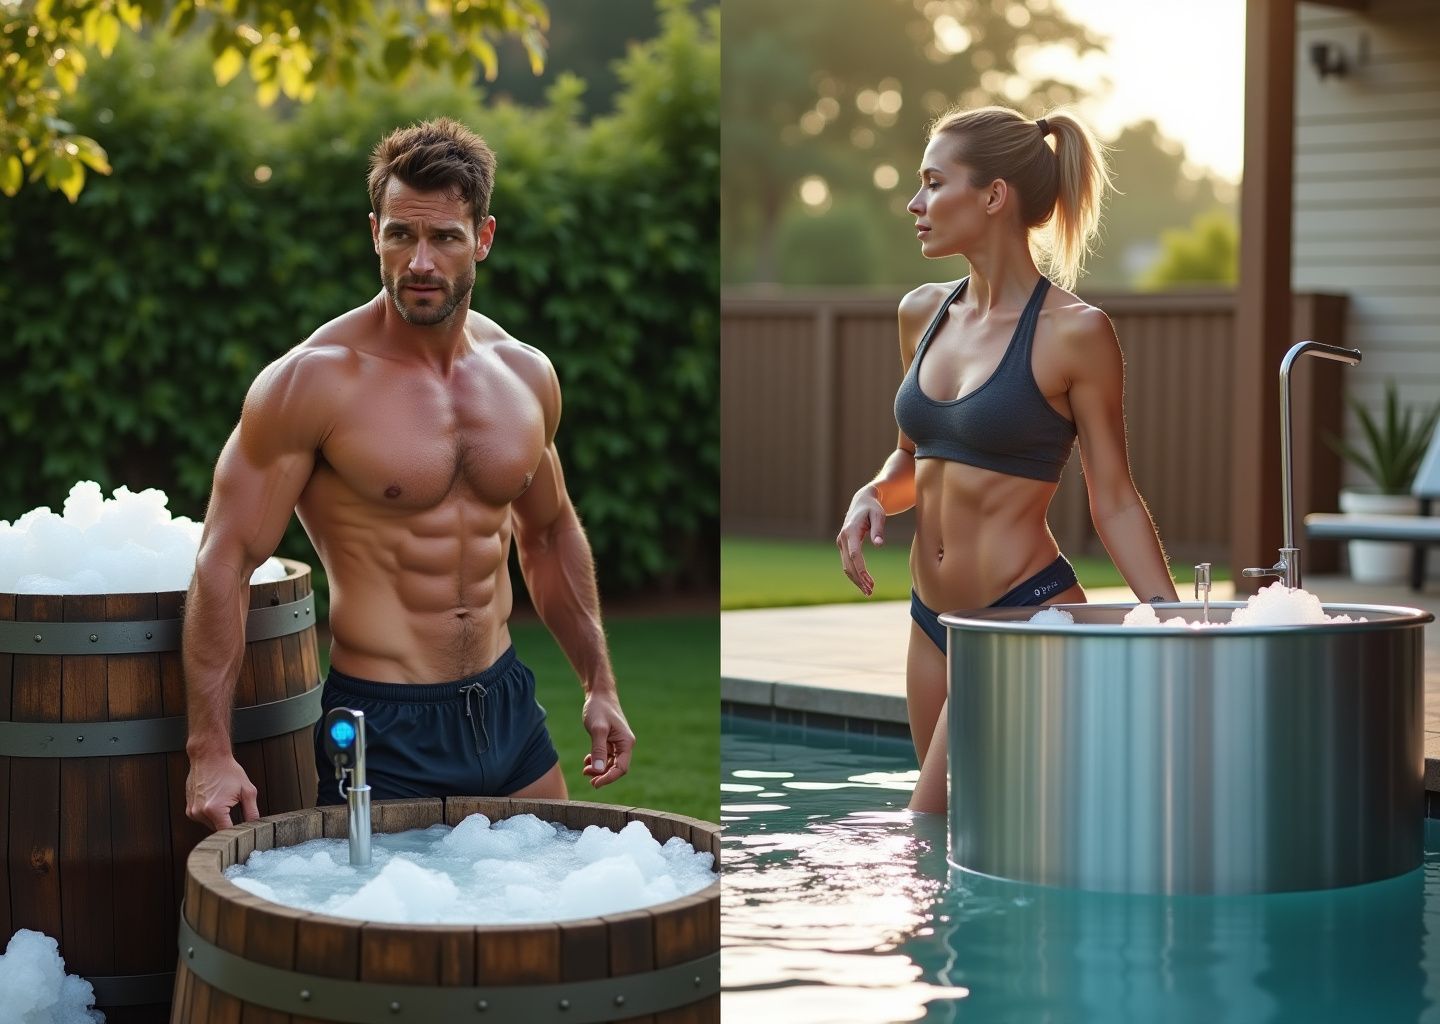
Stock Tank Plunge
This is the most popular DIY path for a reason. It’s rugged, relatively simple, and effective.
- Container: A galvanized steel or plastic stock tank, typically 100-150 gallons. Cost is around $110-$200.
- Cooling: An external water chiller is the heart of the system. A 1/4 HP chiller, capable of getting water down to about 39°F, runs about $550-$600.
- Circulation and Filtration: A small water pump ($100-$120) moves water through an inline canister filter ($40) to keep it clean.
- Sanitation: An ozone generator ($110) or a simple floating chlorine dispenser keeps the water sanitary.
- Electrical: All components must be plugged into a GFCI (Ground Fault Circuit Interrupter) outlet for safety. This is non-negotiable.
A bare-bones setup can be assembled for about $800. A more polished version with a wooden enclosure and better filtration can push the cost to $1,500 or more. According to DIY Cold Plunge, this is a realistic budget.
Pros: Highly durable container, excellent temperature stability with a good chiller, and total control over the build.
Cons: Industrial aesthetic, no warranty on the complete system, and lower resale value. Maintenance is entirely on you.
Converted Chest Freezer
This clever hack uses the freezer’s own cooling system. It’s often the cheapest route to a mechanically cooled plunge.
- Core Components: A 7-15 cubic foot chest freezer ($200-$500) acts as the container, insulator, and chiller all in one.
- Modifications: You must meticulously seal all internal seams with a marine-grade sealant like 3M 5200 to prevent leaks and rust. An external temperature controller (like an Inkbird, ~$40) is essential to override the freezer’s thermostat and keep the water from turning into a solid block of ice.
- Circulation/Sanitation: A small submersible pump can circulate water, but filtration and sanitation are often manual (e.g., using food-grade hydrogen peroxide).
Pros: Unbeatable insulation and low initial cost.
Cons: Significant risk of leaks or electrical failure if not sealed perfectly. Limited size and shape, and the warranty is voided instantly. Durability is a major question mark.
Buying a Commercial Unit
Commercial units are engineered for convenience, safety, and aesthetics. You pay a premium for a product that works out of the box with customer support and a warranty.
Plug-and-Play Tanks
These are all-in-one systems designed for residential use. They are the most common type on the market.
- Core Components: The tub is typically made of durable acrylic or rotomolded plastic, with built-in insulation. The chiller, pump, filtration, and sanitation systems are integrated into a single, clean-looking unit.
- Features: They include digital temperature controls, cartridge filters, and often ozone or UV sanitation. Most run on a standard 110V 15A outlet.
- Examples & Cost: Brands like Plunge and Redwood Outdoors dominate this space. Prices in 2025 generally range from $4,000 to $8,000. For instance, the Redwood Outdoors Denali kit starts around $7,500.
Pros: Easy setup, reliable performance, professional aesthetics, and a warranty (typically 1-3 years). Maintenance is straightforward.
Cons: Higher initial cost and less ability to customize or repair components yourself.
Full-Featured Plunge Baths
This is the premium tier, built for performance, luxury, and commercial-grade durability.
- Core Components: These feature high-end materials like stainless steel tubs and premium wood surrounds. They boast powerful 1 HP chillers that can bring water to 37°F and hold it there, even in hot climates.
- Features: Advanced sanitation (ozone plus UV), powerful jets for water flow, underwater lighting, and sometimes app-based controls are standard. They may require a dedicated 220V electrical circuit.
- Examples & Cost: Think of brands like BlueCube or Renu Therapy. Expect to pay anywhere from $10,000 to over $20,000. PlungeReviews.com notes that top-tier models can easily exceed $21,000.
Pros: Unmatched performance and temperature stability, superior build quality, long warranties (up to 5 years), and high resale value (often retaining 60-70% after two years).
Cons: Very high price point.
When is DIY Functionally the Same as Buying?
A well-executed DIY stock tank build with a properly sized chiller, pump, filter, and ozone generator is functionally equivalent to a mid-range commercial plug-and-play unit. It will deliver clean, consistently cold water on demand. The physiological benefit you get from the cold water is identical.
However, the equivalence ends there. A DIY build is not the same when it comes to safety certifications, ease of maintenance, warranty, and aesthetics. You trade the peace of mind and polish of a commercial product for cost savings and the satisfaction of building it yourself. If a pump fails on your DIY build, you’re troubleshooting it. If it fails on a commercial unit, you’re calling customer support. That difference alone is often worth the extra cost for many users.
Crunching Numbers: Setup Cost, Operating Cost, and Long-Term Value
The choice between building your own cold plunge and buying a commercial unit often boils down to a classic trade-off between time, money, and convenience. While the previous chapter detailed the hardware, this is where we attach the price tags. Let’s break down the real-world costs to help you decide which path makes sense for your goals and budget in 2025.
The Initial Outlay: Upfront Investment
Your first major decision is the initial spend. The gap between a basic DIY setup and a premium commercial unit is significant, but so are the features and finish.
- DIY Cold Plunge: A functional, no-frills build using a stock tank is achievable for around $800 to $1,500. This typically covers a 100-gallon stock tank ($110), a reliable water chiller ($500+), a circulation pump ($110), and necessary plumbing. A more polished version with wood siding, insulation, and an integrated sanitation system like an ozonator can push the total closer to $2,500.
- Commercial Cold Plunge: The market here is broad. Entry-level, plug-and-play tubs start around $4,000. Mid-range models with better insulation, more powerful chillers, and built-in filtration often land in the $5,000 to $9,000 range. Premium units with advanced features like heating for contrast therapy, app connectivity, and high-end aesthetics can easily exceed $15,000.
Running the Numbers: Ongoing Operating Costs
The upfront cost is only part of the story. Ongoing expenses determine the true long-term investment. This is where a chilled system, whether DIY or commercial, shows its value over daily ice bags.
Electricity Consumption
This is your primary operating cost. A water chiller works like a small refrigerator, cycling on and off to maintain temperature. Its energy use depends on its power (kilowatts or kW), how many hours it runs per day, and your local electricity rate. Based on projections from the U.S. Energy Information Administration, we’ll use a 2025 national average of $0.16 per kilowatt-hour (kWh) for our examples.
Here is the formula to estimate your monthly cost:
(Chiller kW) × (Hours of runtime per day) × (30 days) × ($/kWh rate)
Example Scenario: A common 1/4 HP chiller uses about 0.3 kW. In a well-insulated tub, it might run for 6 hours a day to hold a steady 45°F (7°C).
0.3 kW × 6 hours/day × 30 days × $0.16/kWh = $8.64 per month
Even a less efficient or poorly insulated setup running 12 hours a day would only cost around $17.28 per month. Compare this to using ice. At an average of $17 per session for ice bags, plunging just three times a week costs over $200 per month.
Consumables and Maintenance
These costs are relatively low but essential for clean, safe water.
- Filters: Most systems use a simple cartridge filter that needs replacing every 1-3 months. Expect to spend about $40 to $60 per year.
- Sanitizer: Whether you use a simple sanitizer, a mineral system, or an ozonator, you’ll have some chemical costs. This typically runs from $50 to $100 annually.
Long-Term Value and Hidden Factors
Beyond the direct costs, consider the intangible and long-term financial implications.
Lifespan and Resale Value
A well-maintained commercial unit made from acrylic or fiberglass can last 15 years or more, often backed by a 1 to 5-year warranty. They also hold their value, with potential resale at 50-70% of the original price after a few years. A DIY build, while durable if constructed well, has a more variable lifespan (8-12 years is a reasonable expectation for a stock tank setup) and a lower resale value, typically around 30-50% of the component cost.
Non-Monetary Costs and Benefits
- Convenience: A commercial unit is ready when you are. The value of walking out and plunging in perfectly chilled water with zero prep time is arguably the biggest benefit of buying. A DIY setup requires more tinkering and monitoring.
- Downtime & Risk: Building your own plunge means you are the technician. If a pump fails or a leak springs, the downtime and repair are on you. There’s also a higher inherent safety risk with DIY electrical wiring; using a Ground Fault Circuit Interrupter (GFCI) is non-negotiable.
- Carbon Footprint: A modern, efficient chiller running a few hours a day will consume roughly 300-500 kWh per year. This translates to an annual carbon footprint of about 220-400 lbs of CO2, significantly less than the emissions associated with the production and transportation of thousands of pounds of ice annually.
The Bottom Line: A Decision Matrix
To simplify the choice, consider your primary drivers. This matrix outlines the best path based on usage, budget, and priorities.
| Your Profile | Best Path | Reasoning |
|---|---|---|
| The Experimenter / Tight Budget (Plunging < 8 times/month) |
DIY | The low upfront cost of ~$1,000 makes it accessible. The lower usage frequency means the convenience factor of a commercial unit is less critical. |
| The Committed Athlete / Household (Plunging 10-30 times/month) |
Buy (Mid-Range) | At this frequency, the cost of ice becomes prohibitive ($170-$510/month). A ~$5,000 commercial unit breaks even against ice in about a year and offers superior convenience and reliability. |
| The Performance Center / Clinic (High-volume daily use) |
Buy (Premium) | Durability, warranty, safety compliance (like UL certification), and minimal downtime are paramount. The higher initial investment is justified by reliability and professional-grade features. |
| The Uncertain / Renting (Not sure about commitment) |
Rent or Share | Some wellness centers offer memberships. This allows you to test protocols and benefits without any long-term financial commitment. |
Protocols: Temperatures, Timing, Contrast Therapy, and Practical Safety
After figuring out the numbers, the real work begins. Owning a cold plunge, whether built or bought, is useless without knowing how to use it correctly. The right protocol can accelerate recovery and boost performance, while the wrong one can be ineffective or even hinder your progress. Let’s break down the evidence-informed strategies for 2025 to ensure you get the most out of every cold session.
Protocols Tailored to Your Sport
Your training goals dictate your plunging strategy. A marathon runner’s needs are different from a powerlifter’s. Recent sports medicine guidance emphasizes goal-specific protocols.
- For Endurance Athletes (Runners, Cyclists, Swimmers): The primary goal is to manage inflammation and reduce muscle soreness to handle high training volume. An effective protocol is immersing yourself in water at 10–15°C (50–59°F) for 10 to 15 minutes within an hour after your key long or intense sessions. This helps flush metabolic waste and can improve perceived recovery, allowing for better quality in subsequent workouts.
- For Strength and Power Athletes (Weightlifters, Sprinters): This is where timing is critical. Cold exposure can blunt the inflammatory response necessary for muscle hypertrophy (growth). To get the recovery benefits without sacrificing gains, delay your cold plunge for at least 4 to 6 hours after a strength workout. Alternatively, use it on rest days. A shorter, colder exposure of 5 to 8 minutes at around 10°C (50°F) is often sufficient to reduce nervous system fatigue and muscle soreness without significantly impacting adaptation signals.
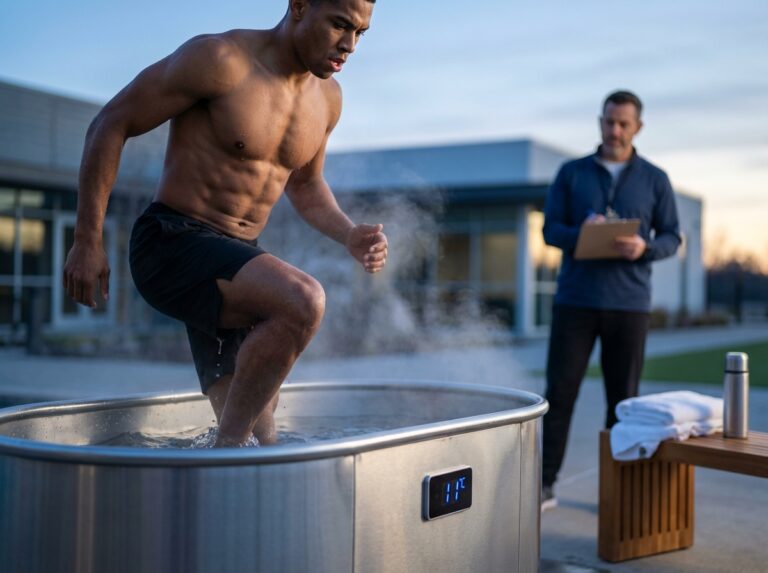
- For Team Sports Athletes (Soccer, Basketball, Football): These athletes need a mix of endurance and power recovery, often with short turnaround times between games. Contrast therapy is highly effective here. It acts like a pump for your circulatory system, helping clear metabolites and reduce swelling.
- For General Recovery and Wellness: If you’re using a cold plunge for mental resilience, mood enhancement, or general aches, a consistent daily routine is best. A 2 to 5-minute plunge in the morning at 10–15°C (50–59°F) can boost alertness and regulate your nervous system.
Mastering Contrast Therapy
Contrast therapy involves alternating between hot and cold water, creating a cycle of vasoconstriction and vasodilation. It’s excellent for reducing soreness and improving mobility after intense games or competitions. A standard, effective template is:
- 3 minutes in a hot tub or shower (around 38–40°C / 100–104°F).
- 1 minute in the cold plunge (around 10–12°C / 50–54°F).
- Repeat this cycle 3 to 5 times, always ending on cold to maximize the anti-inflammatory effect.
Practical Safety and Maintenance Checklist
Safety isn’t optional. Before your first plunge, you must address medical, electrical, and sanitation risks. This is especially true for DIY setups.
- Medical Screening: Cold water immersion is a significant stressor on the body. Consult a physician if you have any pre-existing conditions, especially uncontrolled hypertension, a history of heart disease, epilepsy, or Raynaud’s phenomenon. It is also advised to avoid cold plunging during pregnancy unless cleared by your doctor.
- Electrical Safety: This is non-negotiable. Any electrical component (chiller, pump, ozone generator) connected to your plunge must be plugged into a Ground Fault Circuit Interrupter (GFCI) outlet. A GFCI is designed to shut off power instantly if it detects an imbalance, preventing electric shock. For outdoor or permanent installations, have a licensed electrician verify your setup meets local codes.
- Water Sanitation: A tub of stagnant water is a breeding ground for bacteria. Treat your plunge like a small pool.
- Sanitizer: Maintain a consistent level of chlorine (1-3 ppm) or bromine (2-4 ppm). Test the water 2-3 times per week.
- pH Balance: Keep the pH level between 7.2 and 7.8 to ensure your sanitizer works effectively and the water is comfortable for your skin.
- Filtration: Run your pump and filter for at least 4-6 hours daily to circulate and clean the water. Clean or replace your filter cartridge monthly.
- Shock Treatment: Once a week, “shock” the water with a higher dose of sanitizer to kill any resistant bacteria or algae.
- Advanced Options: UV sterilizers and ozone generators are excellent additions that can reduce your reliance on chemical sanitizers by up to 70% and are standard in many commercial units.
- Winterization for Outdoor Setups: If you live in a climate with freezing temperatures, you must winterize your equipment to prevent damage. Before the first hard freeze, drain the water from your chiller and pumps completely. Use an air compressor to blow out any remaining water from the lines and consider adding a non-toxic RV antifreeze to the plumbing for protection. Cover the tub securely.
By following these sport-specific protocols and safety guidelines, you can transform your cold plunge from a simple tub of cold water into a powerful tool for performance and recovery.
Frequently Asked Questions: Common Concerns Answered
Diving into the world of cold plunges, whether you’re building your own or buying one, brings up a lot of questions. Below are answers to some of the most common concerns we hear, designed to give you clear, practical guidance for your 2025 setup.
Is a DIY cold plunge safe?
A DIY plunge can be perfectly safe, but only if you prioritize electrical and structural integrity. The biggest dangers are electrical shock from improperly wired components and water damage from leaks. A Ground Fault Circuit Interrupter (GFCI) outlet is not optional; it’s your most critical safety device. It’s designed to shut off the power instantly if it detects an imbalance, which could save your life. A 2024 review of DIY aquatic projects highlighted that nearly all serious incidents were linked to bypassing or incorrectly installing GFCI protection, underscoring its importance.
- Action Steps: Hire a licensed electrician to install a dedicated, weather-protected GFCI outlet for your pump and chiller. Never use a standard extension cord. Regularly check all plumbing connections for drips and ensure your electrical components are housed away from potential splashes.
- Alternative: If you are not confident in managing the electrical and plumbing risks, a commercial plug-and-play unit that is UL or ETL certified offers peace of mind, as it has undergone rigorous third-party safety testing.
How much does it cost to run a chiller per month?
You can expect your monthly electricity bill to increase by about $10 to $30. The exact cost depends on the chiller’s horsepower, how well your tub is insulated, the ambient air temperature, and your local electricity rates. A well-insulated tub with a lid in a temperate climate will cost significantly less to run than an uninsulated one in a hot climate. A 2025 cost analysis found that a modern, efficient 1/4 HP chiller runs for about $0.50 to $1.00 per day, making it comparable to running a small chest freezer. You can find a detailed cost breakdown in this True Cost of a Cold Plunge article.
- Action Steps: To keep costs down, build or buy a tub with at least two inches of foam insulation. Always use a thick, well-fitting cover when the plunge is not in use. You can calculate a rough estimate by finding your chiller’s wattage, estimating its daily run time, and multiplying by your utility’s price per kilowatt-hour (kWh).
- Alternative: Forgo the chiller and use ice. While this eliminates the monthly electricity cost, buying bags of ice can cost over $200 per month for frequent users.
What temperature is best for recovery?
The ideal range for promoting athletic recovery is between 50°F and 59°F (10°C to 15°C). Going colder doesn’t necessarily mean better results and can increase physiological stress, shortening the time you can safely spend in the water. A 2023 meta-analysis in a leading sports medicine journal confirmed that this moderate temperature window, combined with 10-15 minutes of immersion, effectively reduces inflammation and delayed onset muscle soreness (DOMS).
- Action Steps: Use an accurate digital thermometer to monitor the water temperature. If you’re new to cold plunging, start at the upper end of this range (around 59°F) and gradually work your way down as your body adapts over several weeks.
- Alternative: If you don’t have a chiller for precise control, use a set number of ice bags to get close to your target temperature and measure before getting in.
Will cold plunges impair strength gains?
Timing is everything. Plunging immediately after a workout focused on building muscle (hypertrophy) may blunt some of the inflammatory responses that signal muscle growth. However, it does not eliminate gains entirely and is highly effective for recovery. A major 2024 systematic review concluded that for athletes prioritizing maximum muscle growth, separating cold water immersion from resistance training by at least four hours is advisable to avoid any potential interference with adaptation.
- Action Steps: If your primary goal is muscle size, schedule your plunges on rest days or several hours before your lifting session. If you’re an in-season athlete focused on recovering for the next game or competition, the recovery benefits of an immediate post-training plunge likely outweigh any minor impact on hypertrophy.
- Alternative: Use other recovery tools like compression, massage, or active recovery on days you lift for hypertrophy.
How often should athletes use them?
A routine of three to four sessions per week is a well-supported frequency for enhancing recovery and reaping consistent benefits without overtaxing your system. While some experienced individuals plunge daily, it’s not necessary for most athletes. A 2023 study on elite athletes found that this frequency was optimal for managing fatigue and muscle soreness throughout a competitive season.
- Action Steps: Align your plunge days with your most demanding training days to maximize recovery. Pay attention to your body’s feedback; if you feel excessively cold, tired, or your sleep is disrupted, consider taking a day or two off.
- Alternative: Even one or two plunges a week can offer significant benefits for reducing inflammation and improving mood.
How do I sanitize a plunge and avoid skin infections?
Proper sanitation is crucial for preventing the growth of bacteria, algae, and biofilm, which can cause skin infections or other illnesses. The key is to treat the water like a small swimming pool, using a combination of filtration and a chemical sanitizer. For specific levels of chlorine, bromine, and pH, refer to the detailed checklist in the “Practical Safety and Maintenance” section above. Regularly testing your water and cleaning your filter are non-negotiable steps for safe, clean water.
Do I need permits or special electrical work? And how does insurance react?
Yes to special electrical work; maybe to permits. For insurance, you must have a conversation.
- Electrical and Permits: The National Electrical Code (NEC) is not a suggestion; it’s a safety standard. Any outdoor electrical device near water requires a GFCI-protected circuit installed by a professional. Building permit requirements vary widely by municipality. You should consult your local building department’s website, searching for regulations on “spas” or “accessory structures,” as some codes apply to any water vessel over a certain size or depth.
- Insurance: Your homeowner’s insurance provider will likely classify a cold plunge as an “attractive nuisance,” similar to a swimming pool. Insurance industry guidance updated for 2025 stresses that homeowners must disclose these additions. Failure to do so could lead to a denied claim if an accident occurs. Call your agent; you may need to add a liability rider to your policy and install safety features like a locking cover.
Conclusions: Final Recommendation and Decision Flow
We’ve covered the science, the costs, and the practicalities. Now it’s time to bring it all together to help you make the final call. Your ideal cold plunge solution depends entirely on who you are, what you need, and what you’re willing to trade. Let’s break down the decision for three common user types.
Recommendations for Your Archetype
The Individual Athlete on a Tight Budget
Your primary driver is performance gain without financial strain. For you, the answer is almost certainly DIY. An initial investment of around $800 to $1,500 for a stock tank setup gets you 90% of the physiological benefits of a commercial unit costing five times as much. The monthly running cost of $10 to $30 is manageable. Your trade-off is your time and effort. You will be the builder, the troubleshooter, and the maintenance technician. If you are comfortable with basic plumbing and electrical safety, the value is unbeatable. The satisfaction of building your own recovery tool is a significant bonus.
The Household or Small Training Group
You value convenience, reliability, and aesthetics. Your group needs a solution that just works, every time, without fuss. The clear recommendation here is to buy a mid-range commercial unit in the $5,000 to $9,000 range. While a DIY project is possible, managing its quirks and maintenance for multiple users can become a source of frustration. A commercial unit offers a plug-and-play experience, a solid warranty, customer support, and a clean look that fits into a home or small gym environment. The higher upfront cost is an investment in saved time, ease of use, and peace of mind for everyone using it.
The Commercial Clinic or Pro Team
Your needs are non-negotiable. You require robust performance, absolute safety, regulatory compliance, and minimal liability. The only viable path is to buy a high-end, certified commercial unit, likely costing $10,000 or more. A DIY setup is a liability risk you cannot afford. Commercial-grade plunges are built for constant use, feature powerful chillers that maintain precise temperatures under heavy load, and include advanced sanitation like ozone and UV. They often come with UL certification, which is critical for insurance and compliance. The investment provides a reliable, safe, and professional tool that protects your clients, your athletes, and your business.
Your Decision-Making Rubric
Use this simple scoring system to find your path. Add up your points to get a final recommendation.
| Decision Driver | Low Score (1 pt) | Medium Score (3 pts) | High Score (5 pts) |
|---|---|---|---|
| Upfront Budget | Under $2,000 | $2,000 – $6,000 | Over $6,000 |
| DIY Skills & Time | High skills, ample time | Some skills, limited time | No skills, no time |
| Usage Frequency | 1-4 plunges per week | 5-10 plunges per week | 10+ plunges or multiple users |
| Need for Warranty & Compliance | Low (personal use) | Medium (household) | High (business, clients) |
- 4-8 Points Your profile strongly suggests a DIY build is the most logical and cost-effective choice.
- 9-14 Points You’re in a grey area. A well-executed, high-end DIY project could work, but the convenience of an entry-level or mid-range commercial unit is very appealing. Weigh your tolerance for tinkering against your desire for simplicity.
- 15-20 Points Your needs for reliability, safety, and performance point directly to buying a commercial unit. The investment will pay for itself in usability and peace of mind.
Final Practical Tips
If you’ve made your choice, here is some final guidance to ensure success.
Top 5 DIY Build Mistakes to Avoid
- Undersizing the Chiller. A 1/4 HP chiller struggles in warm climates or with frequent use. Opt for a 1/2 HP or larger if your budget allows; it will work less hard and last longer.
- Skipping Insulation. An uninsulated tank forces your chiller to run constantly, driving up electricity bills. Insulate the tub walls and lid thoroughly.
- Ignoring Water Sanitation. Stagnant water is a health risk. You must integrate a filtration pump and a sanitation method like an ozone generator or a simple chlorine/bromine floater.
- Compromising on Electrical Safety. All electrical components must be connected to a Ground Fault Circuit Interrupter (GFCI) outlet. No exceptions. Water and electricity are a deadly combination if handled improperly.
- Creating Plumbing Bottlenecks. Using tubing that is too narrow or a pump that is too weak for your chiller will restrict water flow, reducing cooling efficiency and straining your equipment.
Top 5 Features to Demand in a Commercial Unit
- Powerful and Reliable Chiller. Look for at least a 1/2 HP chiller, preferably 1 HP for heavy use, from a reputable brand. It should be able to cool the water to at least 39°F (4°C).
- Multi-Stage Water Purification. A system with a micron filter combined with an ozone generator or UV sterilizer is the gold standard. This keeps water clean with fewer chemicals.
- Durable, Insulated Construction. The tub should be made from a sturdy material like acrylic or composite, not just thin plastic. High-density foam insulation is essential for energy efficiency.
- Comprehensive Warranty and Support. A minimum one-year warranty on all components is standard. Better companies offer 3-5 years and have responsive US-based customer service.
- Plug-and-Play Operation. The unit should be self-contained and require minimal setup. You want to fill it, set the temperature, and have it ready when you are.
Next Steps and Further Reading
Your journey doesn’t end here. Continuous learning is key to optimizing your cold exposure practice safely and effectively. Your next step is to verify the latest information against trusted sources.
Bibliography Template for Your Research (2020–2025 Sources)
- Scientific and Medical Journals. Search databases like PubMed and Google Scholar for meta-analyses and randomized controlled trials on “cold water immersion,” “cryotherapy,” and “athletic recovery.” Look for papers published in journals like the Journal of Sports Sciences or the Scandinavian Journal of Medicine & Science in Sports.
- Regulatory and Safety Codes. For electrical work, consult the latest National Electrical Code (NEC) guidelines for your area. For building, check your local municipal or county building codes, especially regarding outdoor tubs and electrical installations.
- Professional Organization Guidelines. Review position stands and best-practice guides from organizations like the American College of Sports Medicine (ACSM) regarding thermoregulation and exercise for specific contraindications.
- Market Reviews and Pricing Data. Consult reputable product review sites that conduct hands-on testing, such as Garage Gym Reviews, for up-to-date pricing and feature comparisons on commercial models.
Sources
- True Cost of a Cold Plunge (vs Buying Ice) — Ice baths cost: ~$17 every time you plunge — and take ~46 minutes to prep, dump ice, wait, and clean up · Cold plunges cost: ~$4,000 for the tub, ~$30/month to …
- How much does a cold plunge tub cost? What to expect (and what … — The cost of a cold plunge tub can range anywhere from $3,000 to $15,000 — or even higher. The price largely depends on the type of tub, the …
- Best Cold Plunge Tubs 2025: Personally Tested — They can range from under $100 to nearly $15,000, so you've got a lot of choices. At the low end, you're looking at inflatable tubs meant to be filled with ice, …
- 5 Best Ice Bath Tubs for Home (2025 Guide) – Fun Outdoor Living — Find the best ice bath tub for home use with my top 5 picks, plus tips on choosing the right cold plunge for your space, budget, …
- How Much Does a DIY Cold Plunge Cost? — Bare-Bones Stock Tank Cold Plunge | ~$800 · DIY Stock Tank Cold Plunge (Fully Finished) | ~$1,500+ · Bathtub Cold Plunge Conversion | ~$2,500+.
- Cold Plunge Systems & Ice Baths | Redwood Outdoors — Denali All-In-One Cold Plunge Kit. Regular price From $7,499.00.
- The Best Cold Plunge Tubs for 2026: Our Top Picks — Cold Plunge Tub Comparison Table (2026 Edition) ; 1. ReGen Total Wellness. $$$ ; 2. Plunge Pro XL. $$$$ ; 3. Ice Barrel 500. $$ ; 4. Renu Therapy …
- Top 10 Ice Baths of 2025 — BlueCube Cold Plunge · $14,000 – $21,000+ · The BlueCube is an absolute beast of an ice bath. Complete with Ozone, a 1HP Chiller, and the only cold plunge in the …
Legal Disclaimers & Brand Notices
Medical Disclaimer: The content provided in this article, including all discussions of physiological effects, recovery protocols, temperature guidelines, and safety checklists, is for informational and educational purposes only. It is not intended to be a substitute for professional medical advice, diagnosis, or treatment. Always seek the advice of a qualified physician or other healthcare provider with any questions you may have regarding a medical condition, especially before starting any new recovery regimen like cold water immersion, or if you have pre-existing conditions such as heart disease, hypertension, or epilepsy.
Trademark and Brand Notice: All product names, logos, and brands mentioned, including but not limited to Plunge, Redwood Outdoors, BlueCube, Renu Therapy, and Inkbird, are trademarks or registered trademarks of their respective owners. Their use does not imply any affiliation with or endorsement by the trademark holders.