Cold exposure can speed recovery, reduce inflammation and sharpen mental focus—but beginners often ask which modality is best. This article compares ice baths and cold showers, explains safe beginner protocols, ideal temperatures and timing, contrast therapy tips, sport-specific guidance, and practical safety steps so you can choose a plan that fits your goals and health.
How Cold Exposure Works and What Science Says
Deciding between an ice bath and a cold shower can feel like choosing your first challenge in the world of cold exposure. Both are popular, but they offer very different experiences and are suited for different beginner goals. An ice bath, or cold plunge, is a powerful tool for recovery, while a cold shower is an accessible way to build mental resilience. Let’s break down the key differences to help you figure out where to start.
The most significant distinction is immersion. An ice bath provides total, consistent, and inescapable cold. When you submerge your body, the water envelops your skin, creating a uniform thermal layer. This forces a much stronger and faster physiological response. Your body can’t find a warm spot, so it has to work harder to protect your core temperature. This is why a cold plunge is generally more effective than a shower for deep therapeutic benefits like reducing inflammation and speeding up muscle recovery. The temperature is also controllable. You can use a thermometer to set a specific temperature, say 59°F (15°C), and hold it there, allowing you to track your progress with precision.
A cold shower, on the other hand, provides intermittent and incomplete exposure. The water stream hits only parts of your body at any given moment. You can easily shift your position to give certain areas a break. This makes the experience far less intense and mentally easier to handle for a beginner. The water temperature is also less consistent, fluctuating from your home’s water system and making it difficult to measure accurately. Because the cooling is not uniform, your core body temperature doesn’t drop as significantly, and the resulting hormonal and nervous system responses are milder.
Comparing the Beginner Experience
For someone just starting, the choice often comes down to accessibility versus intensity. A cold shower is the path of least resistance. It requires no setup, costs nothing, and can be easily added to your morning routine. The goal here is less about deep physical recovery and more about building the mental habit of embracing discomfort. It’s a fantastic tool for waking up your nervous system, boosting alertness, and practicing control over your breath and mind when faced with a shock. Think of it as a daily dose of mental fortitude training.
An ice bath is a more deliberate and involved practice. It requires preparation, whether you’re using a dedicated plunge tub or filling your bathtub with bags of ice. The initial shock is substantially greater, demanding a higher level of mental focus from the very first second. But this intensity is precisely why it excels for physical recovery. The powerful, uniform cold triggers a strong vasoconstriction response, which helps flush metabolic waste from your muscles and significantly dampens the inflammatory signals that cause soreness after a tough workout. While more daunting, the benefits for an athlete or someone focused on physical performance are more pronounced.
Goals Should Guide Your Choice
So, which is best for you? The answer depends entirely on your primary objective.
- If your goal is mental resilience, convenience, and a daily energy boost: Start with cold showers. They are the perfect entry point. You can build the discipline of facing the cold without the logistical hurdles of an ice bath. The daily practice of calming your mind and controlling your breath under the cold spray is an invaluable skill that will serve you well if you decide to try ice baths later.
- If your goal is enhanced athletic recovery and reducing inflammation: An ice bath is the superior tool. If you’re serious about using cold to manage post-exercise soreness and improve your performance, the full-body immersion of a cold plunge is unmatched. The ability to control the temperature and duration allows for a structured approach to recovery that a shower simply cannot provide.
It’s also worth noting that you don’t have to choose one and stick with it forever. Many people use cold showers as a stepping stone. They start there to build tolerance and mental toughness. Once 2-3 minutes in a cold shower becomes manageable, the idea of a 3-minute ice bath feels much less intimidating. The shower teaches you the foundational skill of staying calm during the initial cold shock, which is crucial for a safe and effective ice bath session.
Ultimately, the best method for a beginner is the one you will actually do consistently. A daily 2-minute cold shower is far more beneficial than a once-a-month ice bath you dread. Start where you feel comfortable but challenged. If the thought of an ice bath is overwhelming, embrace the cold shower. Master it. Then, when you’re ready for the next level of recovery and resilience, the ice bath will be waiting.
Step-by-step Beginner Protocols and Practical Tips
You’ve learned the science behind why cold exposure works. Now it’s time to put that knowledge into practice safely and effectively. This is your step-by-step guide to starting with cold showers and graduating to ice baths, complete with protocols, safety checks, and practical tips to make the process as smooth as possible.
Your First Step: The Beginner Cold Shower Protocol
A cold shower is the most accessible entry point into cold therapy. It requires no special equipment and allows you to control the intensity easily. The goal here isn’t to endure an arctic blast on day one but to build tolerance gradually. Think of it as training your body’s response system.
- Temperature and Duration
Start with your normal warm shower. For the last 30 seconds, turn the temperature down. A good target range is 50–60°F (10–15°C), but for your first few times, aim for the higher end of this range, around 60°F (15°C). This will feel uncomfortably cool but not painfully cold. Each week, try to add 15–30 seconds until you can comfortably handle 2 to 3 minutes of continuous cold water. - Breathing and Positioning
When the cold water hits, your first instinct will be to gasp and tense up. This is the shock response. Your job is to override it. Before turning the water cold, take a deep breath. As the cold starts, focus on a long, slow exhale through your mouth. Make your exhales longer than your inhales; this directly stimulates your vagus nerve and shifts your body into a more relaxed, parasympathetic (“rest-and-digest”) state. Let the water hit your hands and feet first, then your arms and legs, before moving to your torso. Directing the stream onto your upper back and the back of your neck can be particularly effective for stimulating your body’s adaptive responses. - Frequency
A daily cold shower in the morning can be a powerful tool for boosting alertness and building mental resilience. If you’re using it for recovery, take a cold shower after an endurance workout like a run or cycle. As we’ll discuss later, timing is more critical after strength training.
Leveling Up: The Beginner Ice Bath Protocol
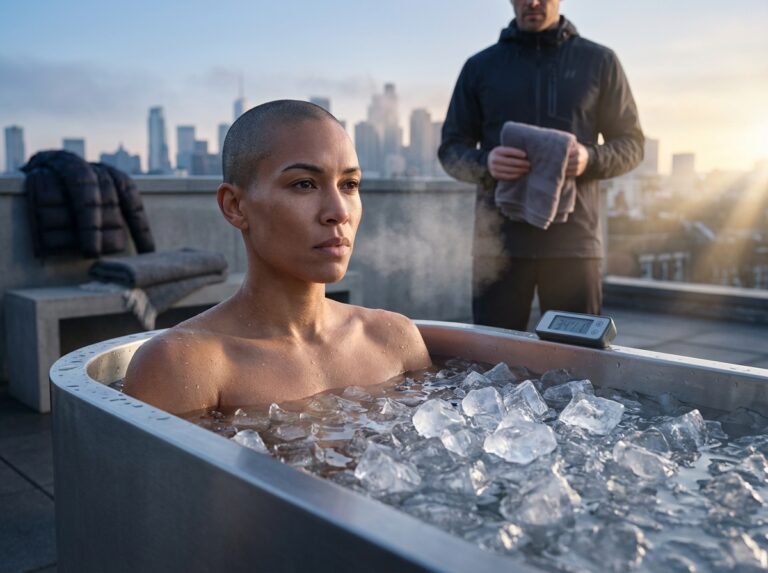
An ice bath, or cold plunge, provides a more profound and systemic effect because your entire body is immersed. This uniform cooling is more potent than a shower, where water only covers parts of your skin at any given moment. The key to ice baths is a slow and controlled progression.
- Beginner Progression
Do not start at freezing temperatures. Your initial goal is a water temperature of 50–60°F (10–15°C); aim for the higher end of that range, around 59°F (15°C), and stay in for just 1 to 3 minutes. Focus entirely on controlling your breath and staying calm. After a few successful sessions, you can begin to lower the temperature gradually. Stay in this range until you can comfortably complete 3 to 5 minutes without distress. - Advanced and Elite Ranges
For context, many experienced athletes and practitioners use temperatures between 45–54°F (7–12°C) for durations of 6 to 12 minutes. This is not a target for beginners. Reaching these levels takes consistent practice over months, not weeks. Pushing too hard, too soon, increases risks and negates the benefits. The principle of “minimum effective dose” applies here; more is not always better.
The Best of Both Worlds: A Contrast Therapy Blueprint
Contrast therapy involves alternating between hot and cold. This creates a vascular “pumping” action as blood vessels dilate (hot) and constrict (cold), which can be more effective than cold alone for flushing out swelling and reducing delayed onset muscle soreness (DOMS). It’s an excellent recovery tool for days between intense training sessions.
A Simple Protocol
- Start with 3 minutes in a hot shower (or sauna, if available).
- Immediately switch to 1 minute in a cold shower or plunge at 50–60°F (10–15°C).
- Repeat this cycle 3 to 4 times.
- Always finish your session on cold to maximize the anti-inflammatory benefits.
This method is particularly useful for athletes during a heavy training week to manage muscle soreness without blunting the adaptive signals from a specific workout.
Timing is Everything: Cold Exposure and Your Training Schedule
When you use cold therapy is just as important as how you use it. Mis-timing it can interfere with your fitness goals by blunting the very adaptations you train for. Align your cold exposure strategy with your sport’s primary goal.
- For Strength and Power Athletes: If your primary goal is building muscle size (hypertrophy) and strength, avoid ice baths for at least 4 to 6 hours after your workout. The inflammatory response post-exercise is a crucial signal that tells your muscles to repair and grow. Research has shown that post-exercise cold water immersion can suppress the anabolic signaling pathways (like mTOR) responsible for muscle protein synthesis, potentially reducing long-term gains.
- For Endurance Athletes: Runners, cyclists, and other endurance athletes can use cold immersion more freely after training to combat inflammation and accelerate recovery.
- For Team Sport Athletes & Competitions: During tournaments or multi-day events, the goal is immediate performance restoration, not long-term adaptation. A short plunge of 1 to 5 minutes in cool water around 59°F (15°C) can significantly reduce perceived fatigue and muscle soreness, helping you feel fresher for the next heat or game.
How Quickly to Expect Benefits
You will feel some benefits immediately. The acute release of norepinephrine provides a powerful mood and energy boost that can last for several hours. Reduced muscle soreness is often noticeable within a few hours post-session. More profound adaptations, like enhanced immune function and resilience to stress, develop over weeks of consistent practice. Keep a simple journal to track your mood, energy levels, and sleep quality to see how both the immediate and cumulative effects unfold.
Recommended Weekly Frequency
For building long-term resilience and general wellness, 2 to 4 sessions per week are sufficient to stimulate adaptation. If your primary goal is acute recovery from intense training, you can use it more often, but be sure to time it correctly around your most important workouts. For general benefits, schedule 2-3 sessions on your rest days. For recovery, use targeted, short sessions after your most demanding training days.
Your Non-Negotiable Safety Checklist
Cold exposure is a stressor. Approach it with respect and preparation.
- Consult Your Doctor First: If you have any known heart or circulatory condition (such as hypertension, arrhythmias, or Raynaud’s syndrome), you must consult your doctor for a full evaluation before attempting any form of cold therapy. The initial cold shock can dangerously spike blood pressure.
- Avoid During Pregnancy: There is insufficient research on the safety of deliberate cold immersion during pregnancy. The significant shifts in core body temperature and blood pressure could pose unknown risks. It is best to avoid cold plunges and consult an obstetrician before continuing even mild cold showers.
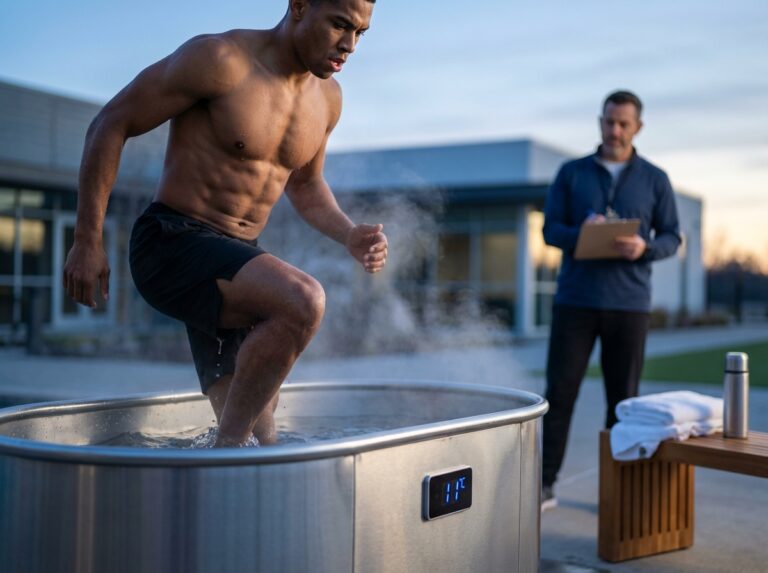
- Have a Companion: For your first few ice baths, never do it alone. Have someone nearby who can assist you if needed.
- Use a Thermometer: Guessing the temperature is a recipe for disaster. Use a reliable waterproof thermometer to know your exact water temperature.
- Prepare Your Exit: Have a warm towel, a dry robe, and maybe even a warm drink ready for when you get out. Your body temperature will continue to drop for a short time after you exit the water, a phenomenon known as the “after-drop.”
- Know When to Stop: Listen to your body. Get out immediately if you experience dizziness, light-headedness, chest pain, difficulty breathing, persistent and uncontrolled shivering, numbness or clumsiness in your hands and feet, or your skin turning a blotchy white or blue color. The goal is to feel invigorated, not hypothermic.
Practical Logistics for Your First Plunge
You don’t need a fancy setup to get started. A simple home approach works perfectly well.
How to Set Up a DIY Ice Bath
Your bathtub is the easiest place to begin. Fill it halfway with cold water, then add ice. A common starting point for achieving a target temperature is a 1:1 or 2:1 ratio of water to ice by volume, but this varies based on your tap water’s starting temperature. Add ice slowly and stir, using your thermometer to check the temperature until you reach your desired range.
Recommended Gear
- A waterproof digital thermometer is essential.
- A timer or your phone to track your duration accurately.
- An insulated seat or a small towel to sit on can make the tub more comfortable on your skin.
When to Seek a Professional Facility
If you find you’re consistent with cold plunging and want to take the guesswork out of it, visiting a professional facility is a great option. They offer precise temperature control, a clean environment, and often have staff on hand for safety, allowing you to focus solely on your breath and the experience.
Conclusions and Practical Takeaways
You’ve navigated the science and sorted through the common questions. Now it’s time to put theory into practice. This is where your journey with cold exposure truly begins, moving from understanding to doing. We’ll distill everything into a clear, actionable plan, helping you decide where to start and how to progress safely and effectively.
Your Starting Point: Deciding Between a Shower and a Bath
The choice between a cold shower and an ice bath isn’t about which one is universally “better,” but which is better for you, right now. Let’s recap the key differences to help you decide. A cold shower is primarily a surface-level experience. The water hits your skin intermittently, creating a strong but inconsistent stimulus. This makes it an excellent tool for building mental fortitude and a daily habit. It’s accessible, quick, and requires no setup. An ice bath, on the other hand, provides total, constant immersion. This envelops your body in cold, leading to a much faster and more profound drop in core body temperature and a powerful systemic physiological response. This is why it’s superior for deep tissue recovery and significantly reducing inflammation.
Here’s a simple decision guide:
- Choose a cold shower if: You are a complete beginner to cold exposure. Your main goal is to build mental resilience, boost your energy in the morning, or simply create a consistent wellness habit. The low barrier to entry is its greatest strength; you can start today with zero preparation. It’s the perfect training ground for your mind and nervous system.
- Progress to an ice bath when: You are an athlete looking for targeted recovery after intense training sessions or competitions. You need to manage significant muscle soreness and inflammation. You’ve become comfortable with cold showers and are no longer feeling the same level of challenge or adaptation. You are ready for a more potent and controlled therapeutic tool.
Your 4-Week Beginner Progression Plan
Consistency is more important than intensity when you start. This plan is designed to build your tolerance and confidence gradually. Listen to your body and don’t be afraid to repeat a week if you don’t feel ready to advance.
Week 1: Building the Habit with Cold Showers
Your goal this week is simply to get comfortable with the cold and establish a routine.
- What to do: At the end of your normal warm shower, turn the tap to fully cold.
- Temperature: Aim for around 60°F (15°C), or as cool as you can tolerate without pain.
- Duration: Start with just 15-30 seconds. Focus on controlling your breath; long, slow exhales will calm your initial gasp reflex.
- Frequency: 3 to 5 days this week.
Week 2: Extending Duration or Taking the Plunge
This week, you’ll either deepen your shower practice or attempt your first ice bath.
- Option A (Showers): Increase your time under the cold water to 60-90 seconds. Continue focusing on calm, controlled breathing.
- Option B (First Ice Bath): Prepare a bath with cold water and add a little ice to bring the temperature down.
- Temperature: Aim for a manageable 59°F (15°C). Don’t get obsessed with arctic temperatures; consistency is key.
- Duration: 1 to 2 minutes. This will feel much more intense than a shower, so keep the time short.
- Frequency: 1 or 2 ice baths this week, on recovery days. Continue with short cold showers on other days if you like.
Week 3: Increasing the Challenge
Now you’ll push the duration or lower the temperature slightly to encourage further adaptation.
- If sticking with showers: Aim for 2-3 minutes of continuous cold water exposure.
- If using ice baths:
- Temperature: Try to lower the water to 50-55°F (10-13°C).
- Duration: Extend your time to 3 minutes. Focus on relaxing into the cold rather than fighting it.
- Frequency: 2 to 3 sessions this week.
Week 4: Establishing Your Baseline
By now, you should feel more adapted. The goal is to find a sustainable routine you can maintain.
- Showers: A 3-minute cold shower can be your new daily standard for energy and resilience.
- Ice Baths: Aim for 3-5 minutes at 50-55°F (10-13°C). This is a solid therapeutic dose for recovery.
- Frequency: 2 to 4 times per week, timed correctly around your workouts or on rest days.
Safety and Your Next Steps
Your safety is the absolute priority. While cold exposure is safe for most, it places stress on the cardiovascular system. If you have any pre-existing conditions, especially high blood pressure, heart disease, or Raynaud’s syndrome, you must get clearance from your doctor before starting. Always listen to your body’s signals. Intense, uncontrolled shivering, dizziness, numbness, or chest pain are clear signs to end your session immediately. Never plunge alone, especially when you are new to the practice.
Once you’ve established a consistent routine, you can begin to optimize.
- Track Your Data: Start a simple journal or use a wearable device to track how cold exposure affects you. Note your sleep quality, daily energy levels, mood, and perceived muscle soreness. This objective feedback is invaluable for tailoring your protocol.
- Create a Recovery Stack: Cold exposure is a powerful tool, but it’s not a magic bullet. It works best when combined with other foundational recovery strategies. Pay close attention to your nutrition, prioritize 7-9 hours of quality sleep, and consider adding other modalities like compression therapy or mobility work.
- Expand Your Knowledge: Once you’ve mastered these beginner protocols, you might explore more advanced techniques. Learning about deliberate cold exposure science or contrast therapy can provide new stimuli for adaptation.
Start slow, listen to your body, and let consistent, mindful practice be your guide to unlocking your potential.
Sources
- Cold Shower vs. Ice Bath: Which is Better? – Plunge — Discover the pros & cons of cold showers vs. ice baths for post-workout recovery. Find out which one is most effective for quickly soothing sore muscles.
- Cold Plunge vs Ice Baths, Showers, and Cryotherapy – Greentoes — Cold plunges are more moderate. Beginners may find a plunge easier to handle, while ice baths are not for the faint of heart.
- Ice Bath vs Cold Shower? What Yields More Benefits? – Coldture — A cold shower offers convenience, a quick energy boost, and improved mental health. Conversely, an ice bath is superior for deep workout …
- Cold Shower vs. Ice Bath: Is There a Real Difference? – Hone Health — The truth of the matter is this: cold showering is far more cost-efficient and convenient than ice bathing, but ice bathing is more effective.
- The difference between a cold shower and an ice bath | Brass Monkey — Cold water is four times stronger than cold air at extracting heat, so start the water in your bath a little 'warmer' at 5°C or a little warmer.
- Cold Plunges vs Ice Showers: Which is Better for You? — Cold plunges often offer more precise temperature control and longer immersion times, while ice baths can be more accessible and convenient for …
- Cold Plunge vs. Ice Bath: Key Differences, Benefits, and Which Is … — A: A cold plunge is more effective than a cold shower because full-body immersion leads to faster cooling and a stronger physiological response.
- Cold Plunge, Ice Bath, Or Cold Shower? – PolarMonkeys — An ice bath is more flexible but less predictable. The ice bath vs cold shower comparison is all about intensity and accessibility. An ice bath offers a …
- Cold Plunges and Deliberate Cooling – Huberman Lab — Although cold showers are not as effective as cold baths, they are still beneficial for those who do not have access to a cold plunge tub. 00:30:11. How Cold …
Legal Disclaimers & Brand Notices
The content of this article is provided for informational and educational purposes only. It is not intended to be a substitute for professional medical advice, diagnosis, or treatment. Always seek the advice of your physician or other qualified health provider with any questions you may have regarding a medical condition, especially before starting any new health regimen, including cold exposure therapy. Never disregard professional medical advice or delay in seeking it because of something you have read in this article.
All product names, logos, and brands mentioned herein are the property of their respective owners. Their use does not imply endorsement or affiliation.